Help & docs
Everything you need to host
Join Us For gives every event its own web page where guests RSVP, with no accounts or apps for them. This guide walks through every feature, from your first event to the thank-yous.
Create your first event
- Create an account at joinusfor.app/register. We'll email you a link to verify your address. You can start building right away, but you'll need to verify before publishing.
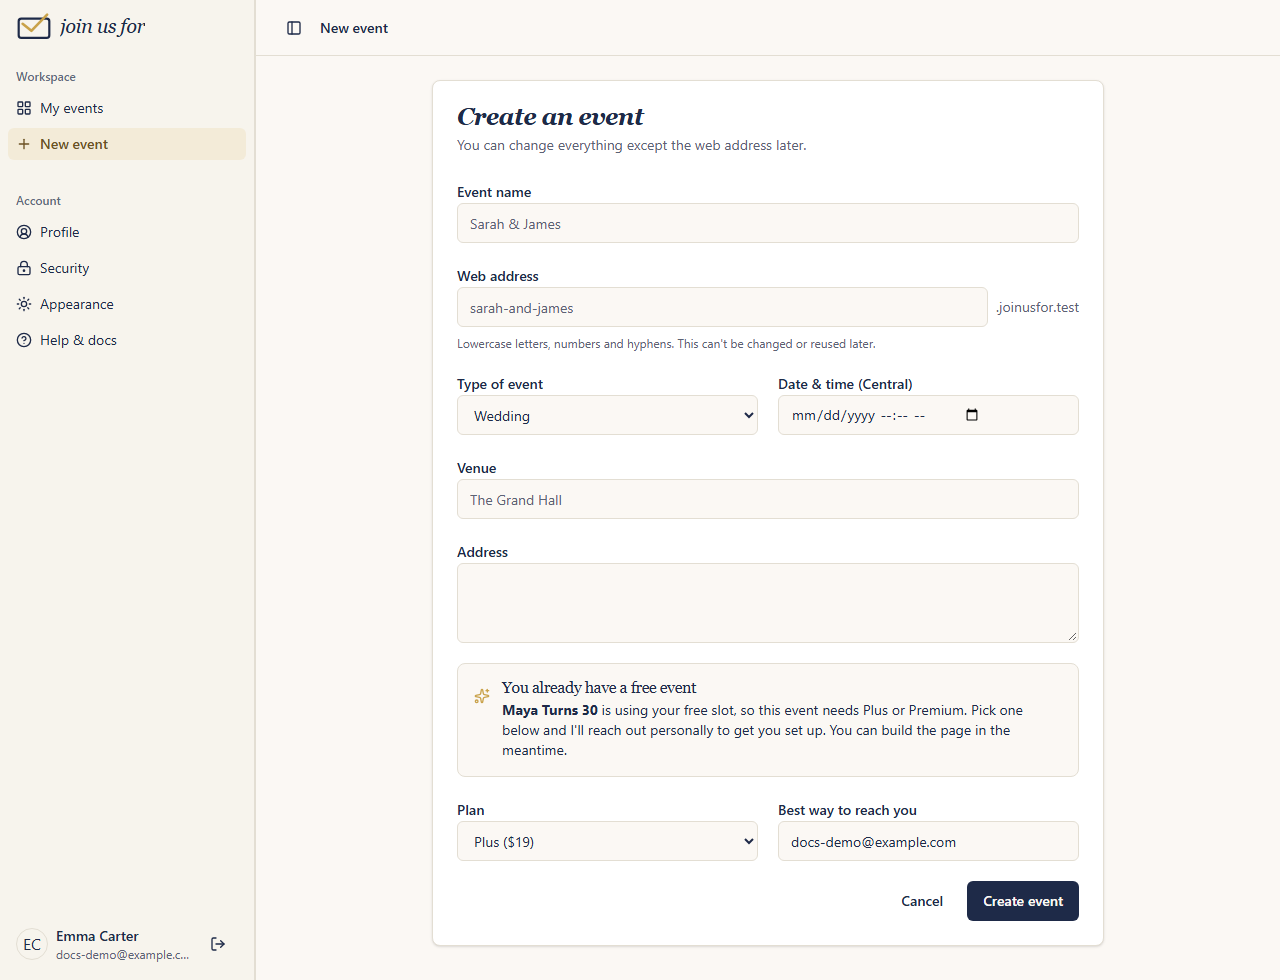
- Click "New event" and fill in the basics: the event name (e.g. "Sarah & James"), the type, the date and time, and the venue.
- Choose your web address. This becomes your event's link, like
sarah-and-james.joinusfor.app. Use lowercase letters, numbers, and hyphens.
Your web address is permanent. It can't be changed later and it's never reused, even after an event is deleted, so a stale link
will never point at someone else's event. A few names (like www, admin, and help) are reserved.
After creating, you land on your event's Overview. From the sidebar you can open Settings to add a message to guests, an end time, an RSVP-by date, and how many plus-ones each guest can bring.
All dates and times are in Central time.
Preview & publish
New events start as drafts. Guests can't see a draft. Visiting the link shows a "not found" page.
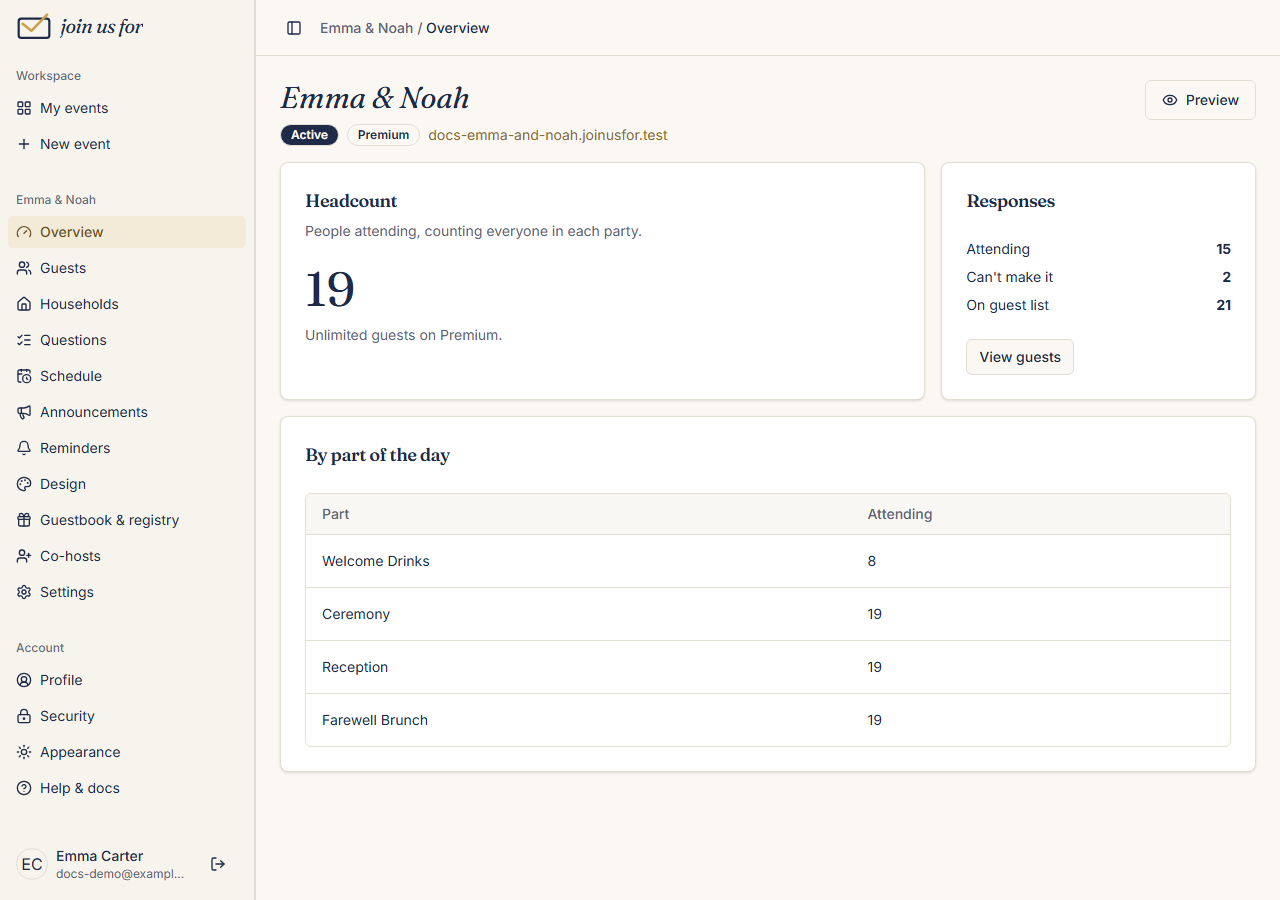
- Preview (on the Overview) opens your page exactly as guests will see it. The preview link works for one hour and you can share it with a partner for feedback.
- Publish makes the page live and opens RSVPs. You need a verified email to publish.
- Unpublish (in Settings) takes the page offline again without losing anything.
Plans & pricing
Plans are per event, paid once. There's no subscription. Each event can be on a different plan.
| Free | Plus · $19 | Premium · $49 | |
|---|---|---|---|
| Guests attending | Up to 50 | Up to 250 | Unlimited |
| Event page & RSVPs | ✓ | ✓ | ✓ |
| Announcements on your page | ✓ | ✓ | ✓ |
| Themes | 2 | All | All |
| Custom RSVP questions | ✓ | ✓ | |
| Guest list import, households & plus-ones | ✓ | ✓ | |
| Email invitations & reminders | ✓ | ✓ | |
| Email guests when you post an announcement | ✓ | ✓ | |
| CSV export | ✓ | ✓ | |
| Password protection | ✓ | ✓ | |
| No "made with Join Us For" footer | ✓ | ✓ | |
| Schedule with separate RSVPs (ceremony, reception…) | ✓ | ||
| Text message invites, reminders & announcements | ✓ | ||
| Guestbook & guest photo uploads | ✓ | ||
| Registry links | ✓ | ||
| Co-hosts | ✓ |
Your free event
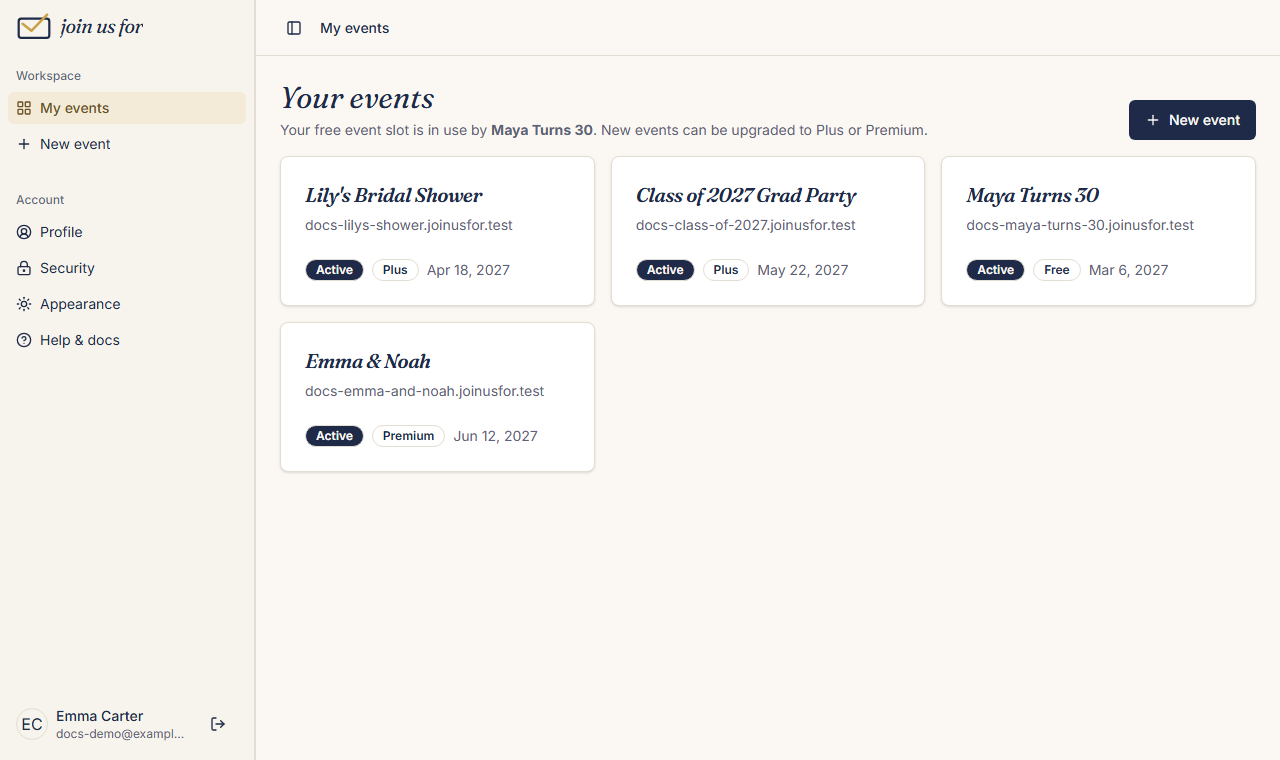
Each account can have one free event at a time. Drafts count, so a free draft uses your slot too. The slot opens up again when that event ends, is archived, or is deleted, or as soon as you upgrade it. Paid events never use the free slot, so you can have as many as you like.
If you create a new event while your free slot is in use, you'll be asked to pick Plus or Premium for it. You can build the page right away; it can be published once the upgrade is in place.
In the dashboard sidebar, a lock next to a menu item means that feature needs an upgrade. Clicking it shows your options.
What guests see
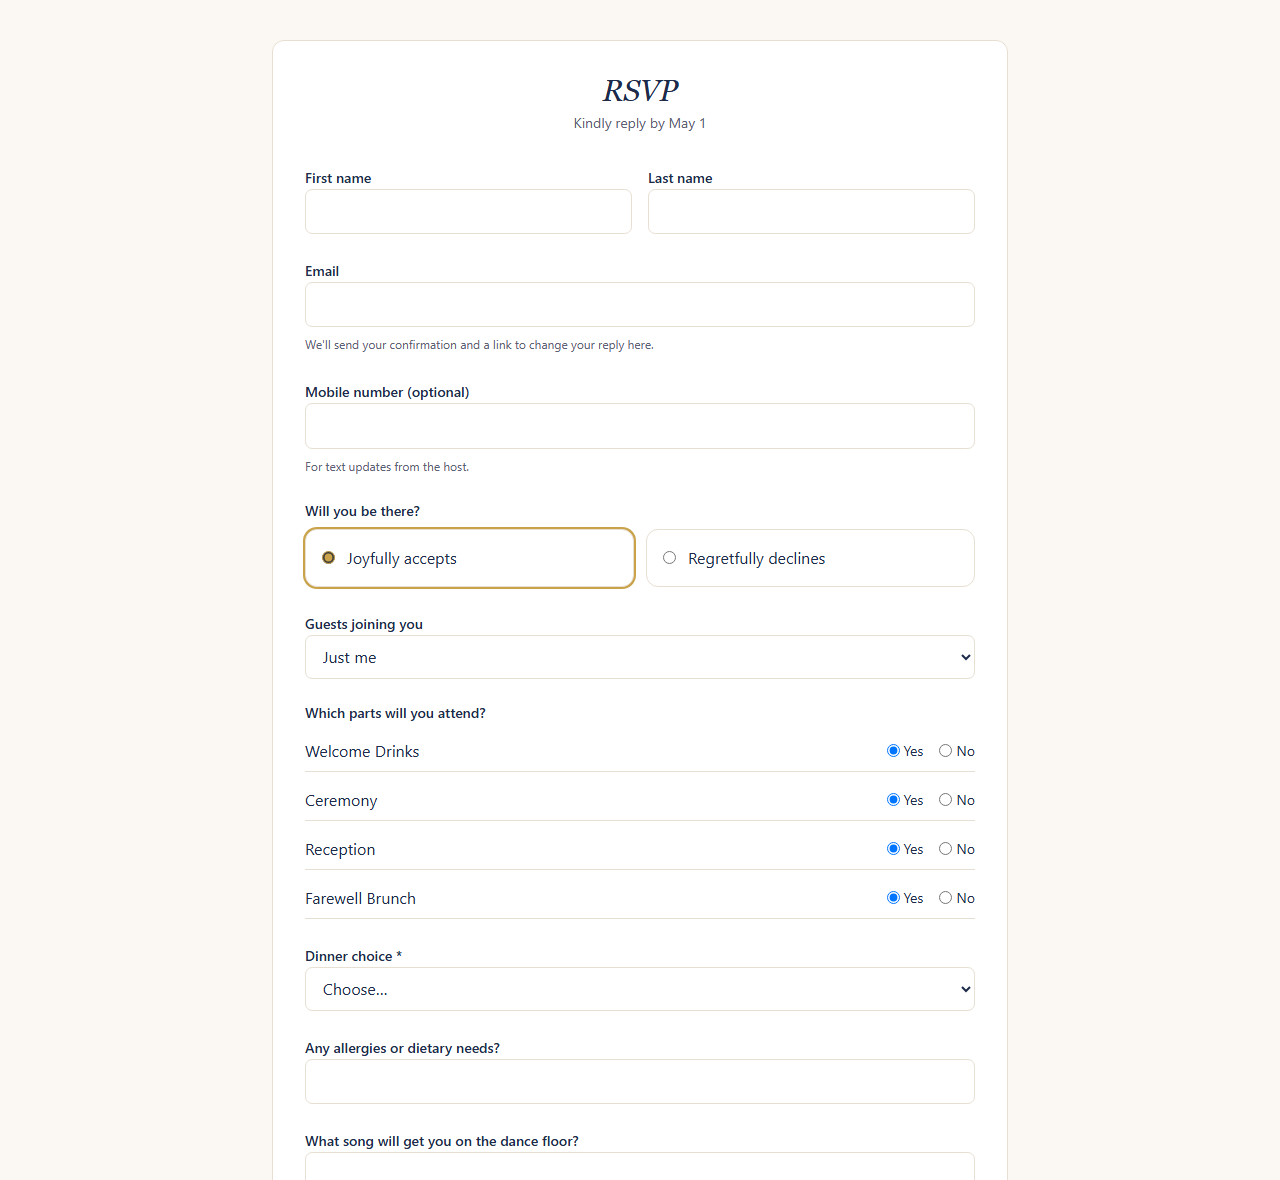
Guests never create an account. They open your link and RSVP right on the page:
- They enter their name and email, choose "Joyfully accepts" or "Regretfully declines," and pick how many guests are joining them (up to the plus-ones you allow). They can add their guests' names too.
- They get a confirmation email with a private link to change their response anytime before RSVPs close.
- If someone tries to RSVP again with the same email, their original answer is kept and the change link is emailed to that address, so nobody can overwrite another guest's response.
- Your page shows the date, venue (with a map link), your message, the schedule, announcements, and any extras your plan includes.
RSVPs close automatically at your RSVP-by date (if you set one), when the event ends, or when your guest list is full.
Headcount & guest limits
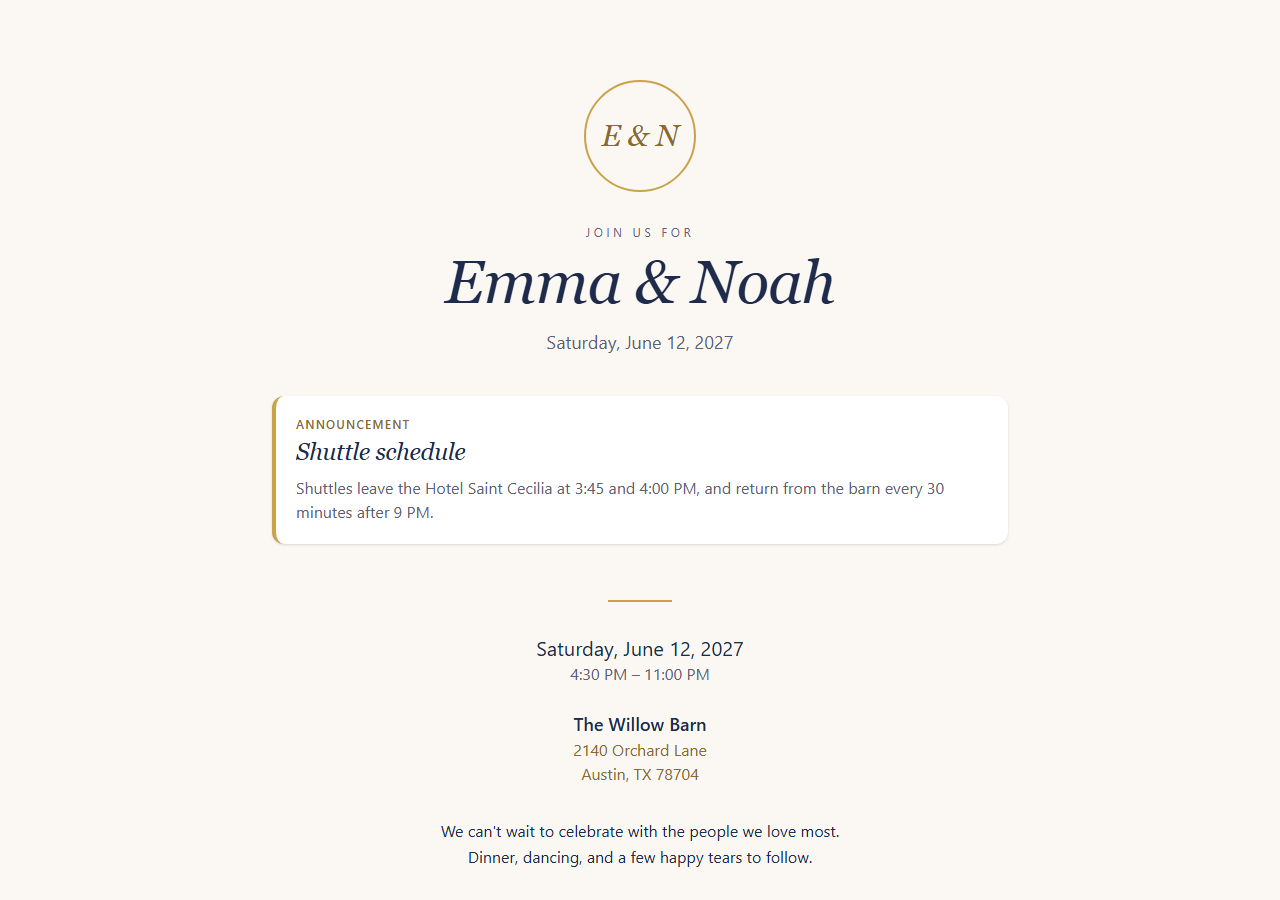
Your headcount counts people attending, not responses. A guest who RSVPs yes with two plus-ones counts as 3. Declines never count.
The Overview shows a progress bar with how many spots are left on your plan:
- When you're about 80% full, you'll see a nudge to upgrade.
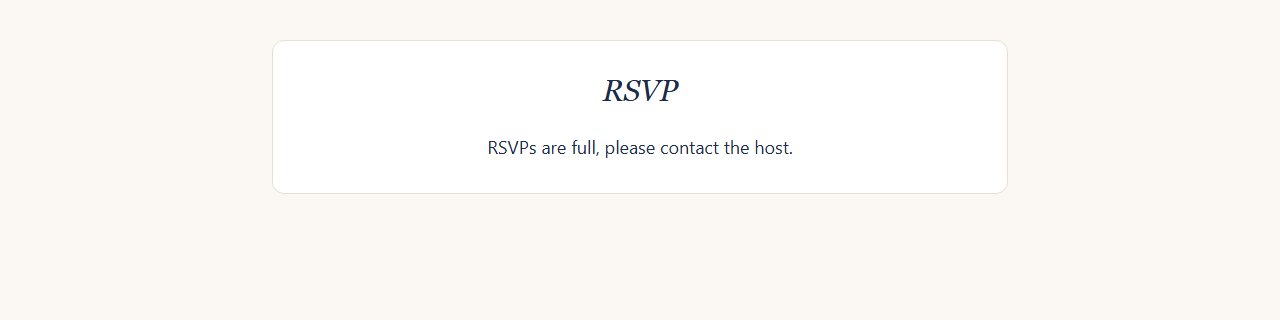
- When you reach the limit, new "yes" RSVPs stop. Guests see "RSVPs are full, please contact the host" instead of the form.
- If a party wouldn't fit (say there are 2 spots left and a party of 3 tries to RSVP), the whole RSVP is turned away instead of letting part of the party in.
Upgrading raises the limit immediately, and the RSVP form reappears for guests.
Managing the guest list
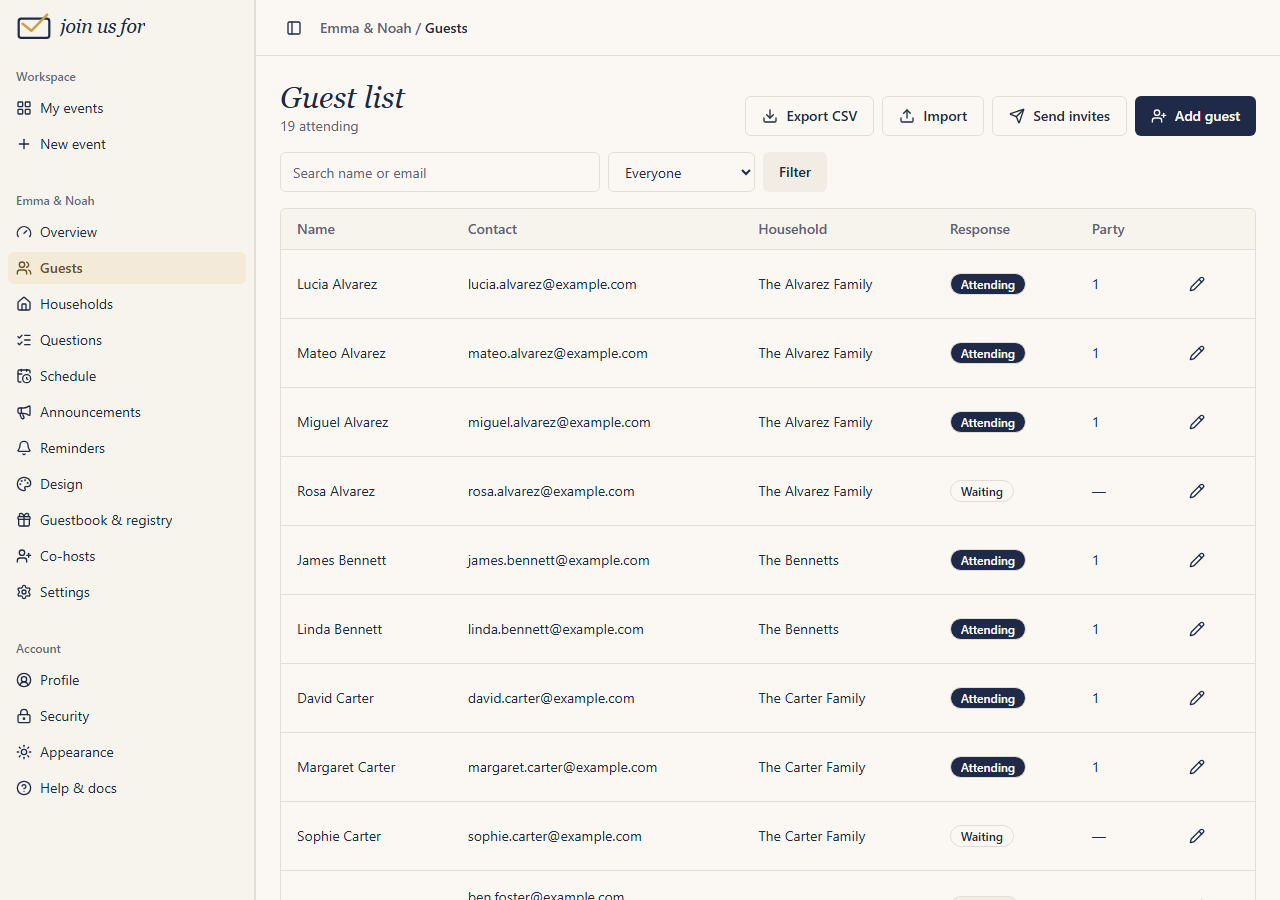
The Guests page lists everyone who has RSVP'd or been added, with their response and party size. You can:
- Search by name or email, and filter to attending, not attending, or no response yet.
- Add a guest by hand (handy for people who reply by phone).
- Edit a guest's details, how many plus-ones they may bring, or record their response for them. Guest limits still apply when you record a "yes."
- Remove a guest and their response.
Importing guests Plus
On the Guests page, click Import and upload a CSV file (from Excel, Numbers, or Google Sheets: "Download as CSV"). The first row must be column names. Only first_name is required:
first_name,last_name,email,phone,household,household_size,plus_ones
Ann,Smith,[email protected],555-0100,The Smiths,4,
Ben,Smith,,,The Smiths,4,
Cara,Jones,[email protected],,,,1householdgroups guests together (see below);household_sizecaps how many from that household can attend.plus_onessets how many guests that person may bring, overriding your event-wide setting.- Importing again updates guests who have the same email instead of creating duplicates. Rows without a first name are skipped.
Imported guests can RSVP from your page with the email you imported, or from the link in their invitation.
Households & plus-ones
Plus-ones are decided in this order:
- A guest's own plus-one limit, if you set one on that guest.
- Otherwise, their household's size minus themselves (a household of 4 lets each member bring up to 3).
- Otherwise, the event-wide setting in Settings → Plus-ones each guest may bring.
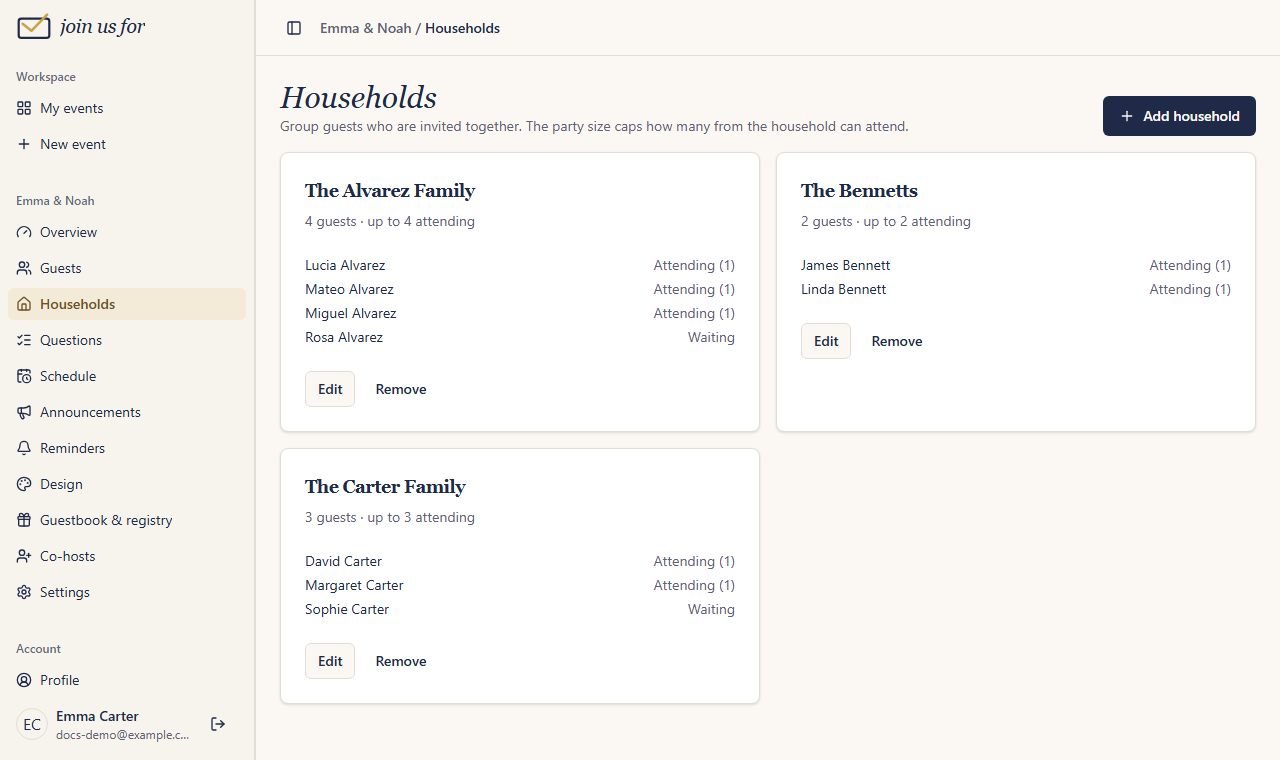
The Households page (Plus) shows each household, its members, and who has replied. You can add, rename, resize, or remove households.
Custom questions Plus
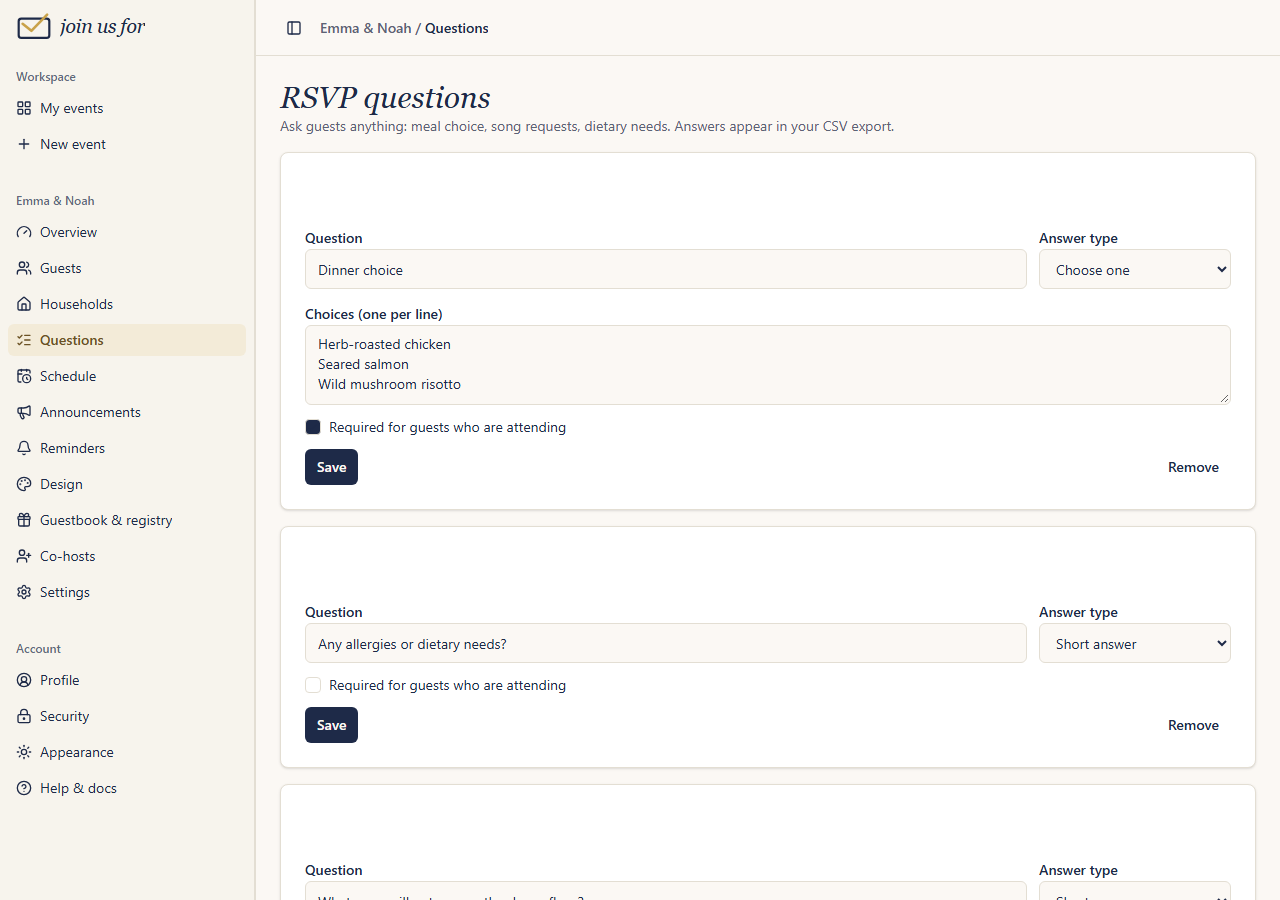
Under Questions, add anything you want to ask on the RSVP form: meal choice, dietary needs, song requests, or "Will you need a shuttle?"
- Short answer or long answer for free text.
- Choose one for a dropdown (enter one choice per line).
- Yes / no checkbox.
Mark a question required to make attending guests answer it. Guests who decline are never forced to answer. Answers appear in your CSV export.
Exporting to CSV Plus
Click Export CSV on the Guests page to download your whole list: names, contact info, household, response, party size, plus-one names, notes, answers to every question, and (on Premium) each part of the schedule. It opens in Excel, Numbers, or Google Sheets.
Export keeps working after your event ends or is archived.
Announcements
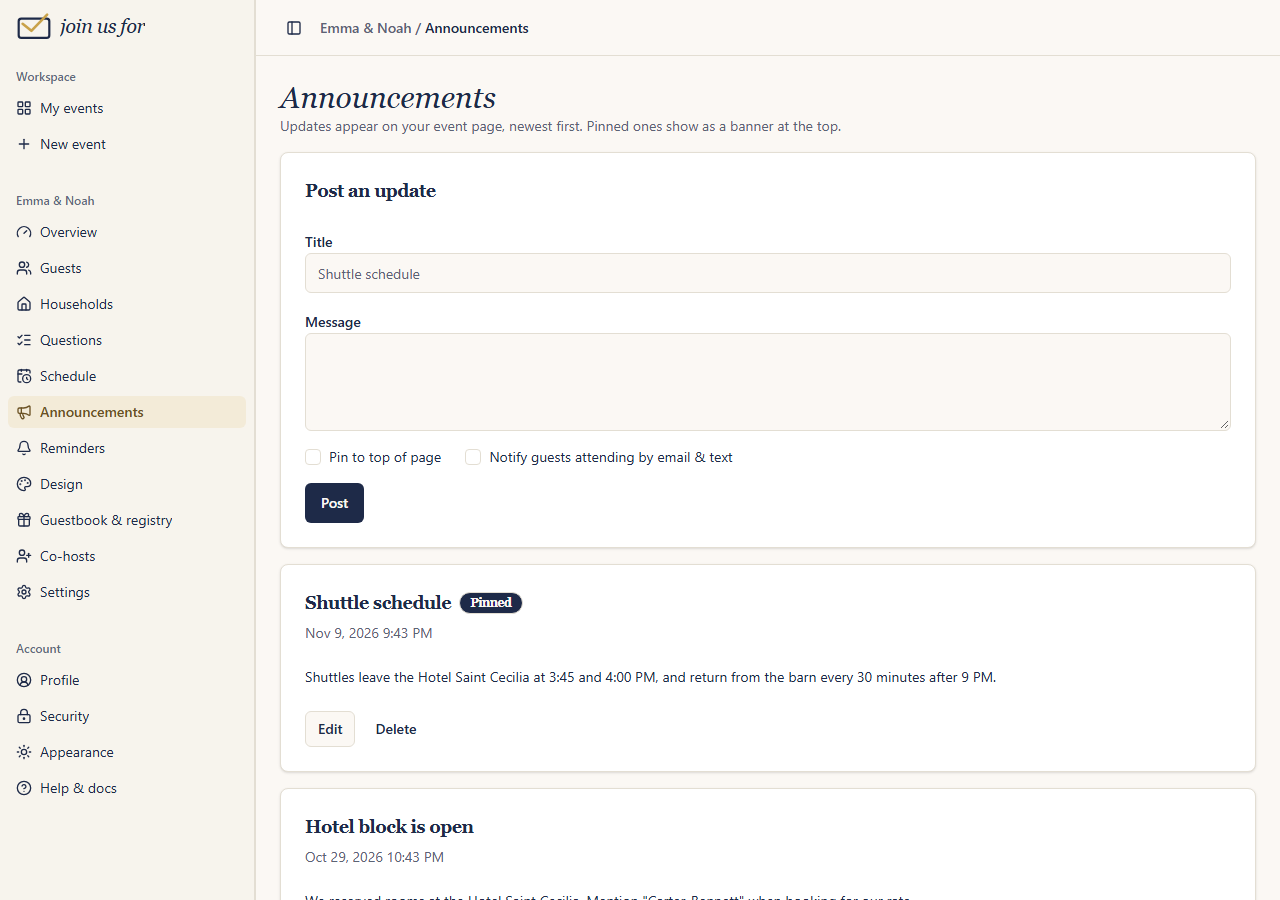
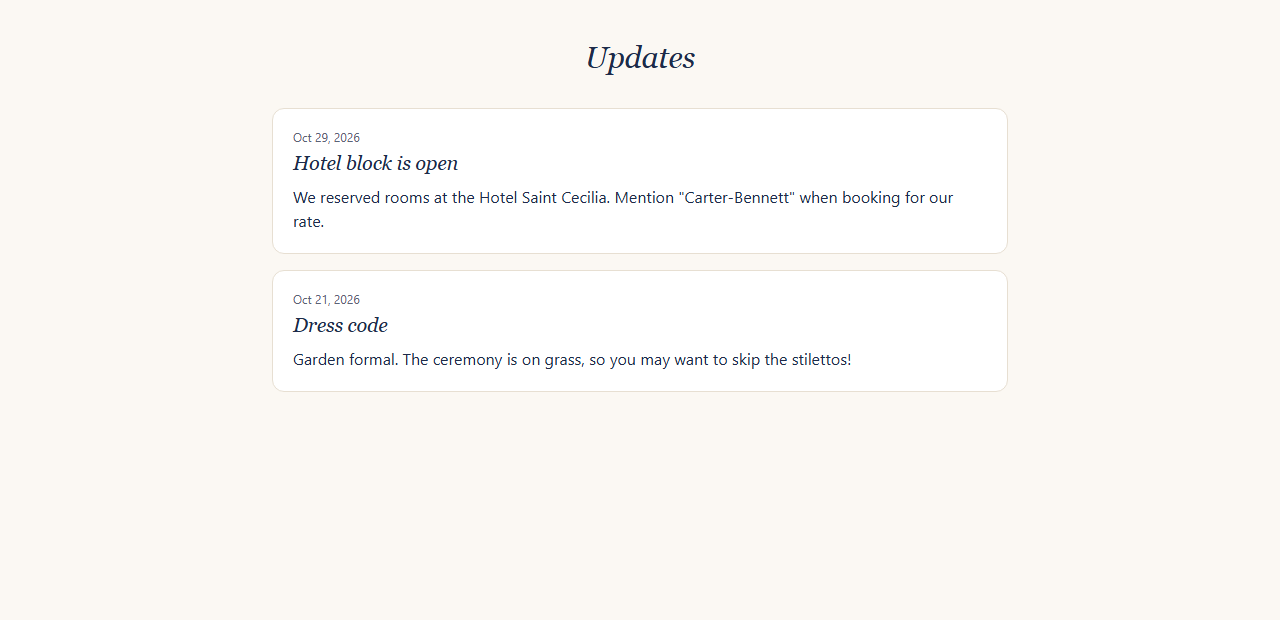
Post updates from the Announcements page: shuttle times, a dress code, a change of venue. They appear on your event page, newest first.
- Pin an announcement to show it as a highlighted banner at the top of your page.
- Notify guests (Plus) emails it to everyone who RSVP'd yes. On Premium, guests who gave a mobile number also get a text.
- Notifications go out once. Editing an announcement later doesn't re-send it.
Posting announcements is free on every plan; only notifying guests needs an upgrade.
Invitations Plus
After importing your guest list and publishing, click Send invites on the Guests page. Everyone who hasn't replied yet gets an email with a personal RSVP link (and a text on Premium if they have a phone number).
Reminders Plus
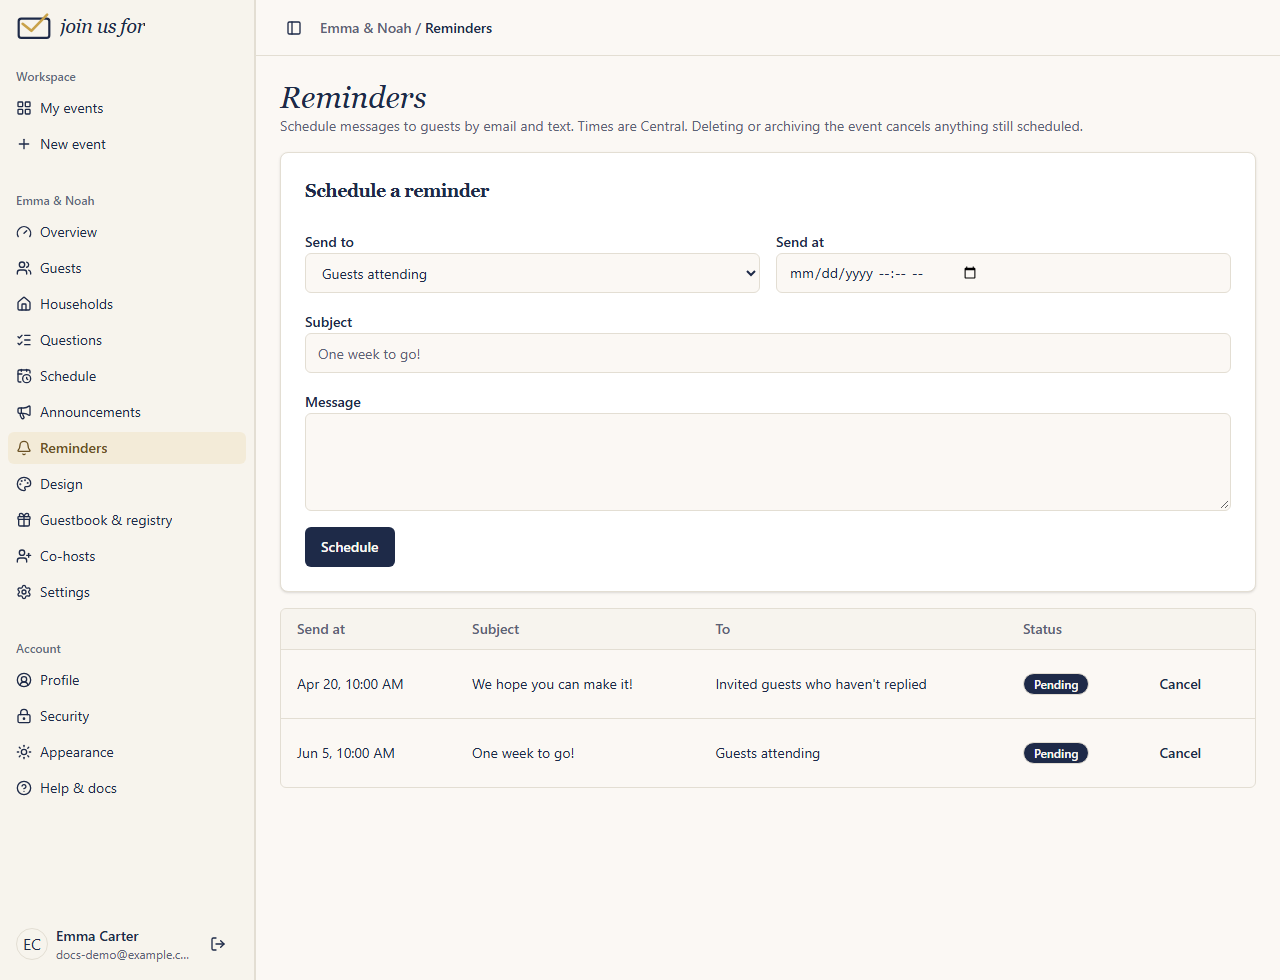
Under Reminders, schedule a message for a specific date and time (Central). Choose who gets it:
- Guests attending: perfect for "One week to go!" or parking details.
- Invited guests who haven't replied: a gentle nudge before your RSVP-by date.
Each reminder includes the guest's personal RSVP link. You can cancel a reminder any time before it sends. Archiving or deleting an event cancels anything still scheduled.
Text messages Premium
On Premium, the RSVP form asks guests for an optional mobile number. Invitations, reminders, and announcement notifications are then sent by text as well as email to anyone who shared a number.
Themes & design
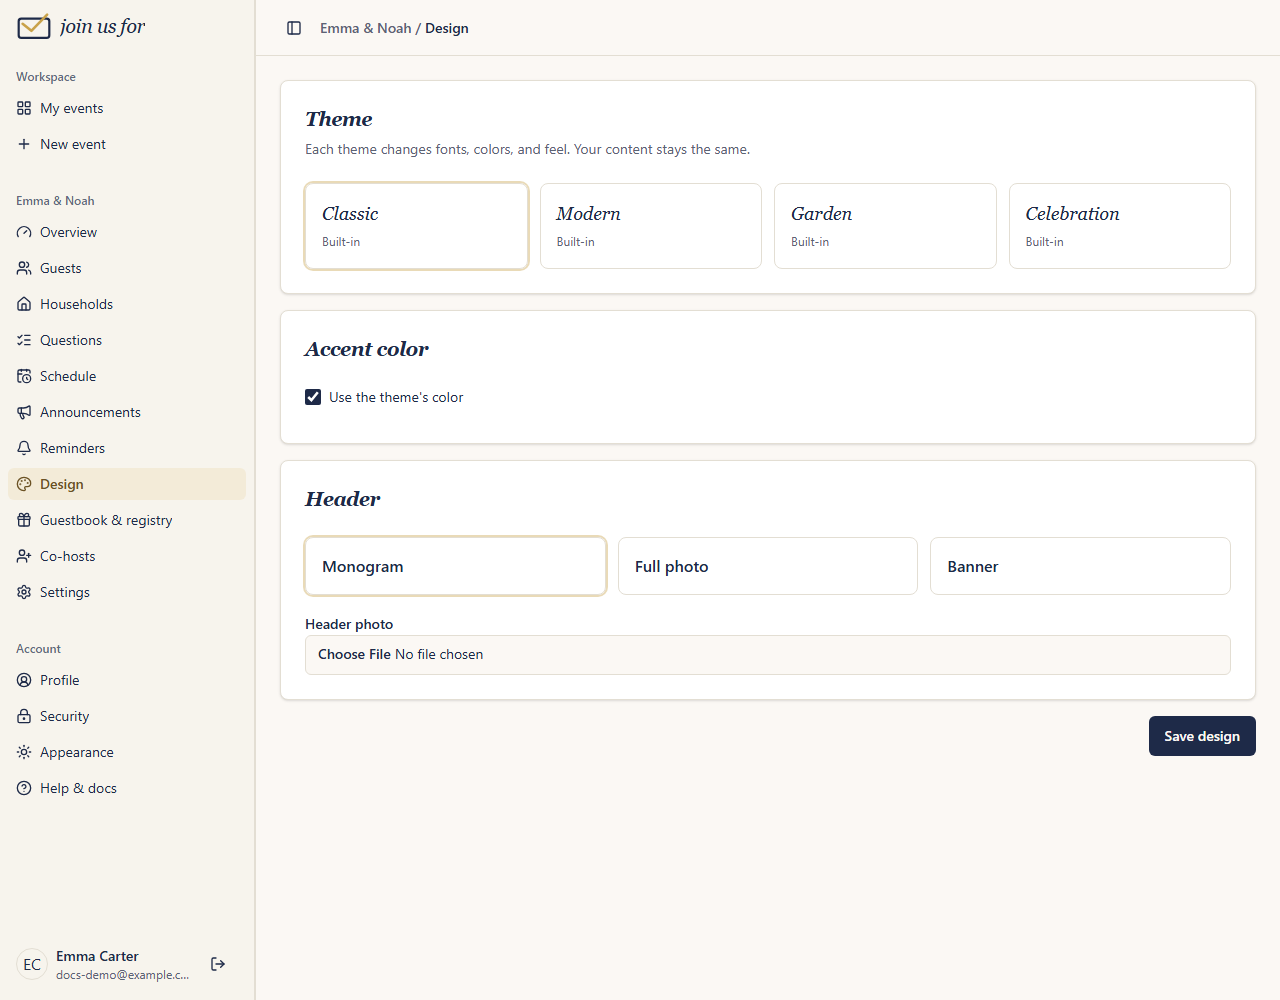
Open Design to change how your page looks. Your content stays the same; only the style changes.
Themes
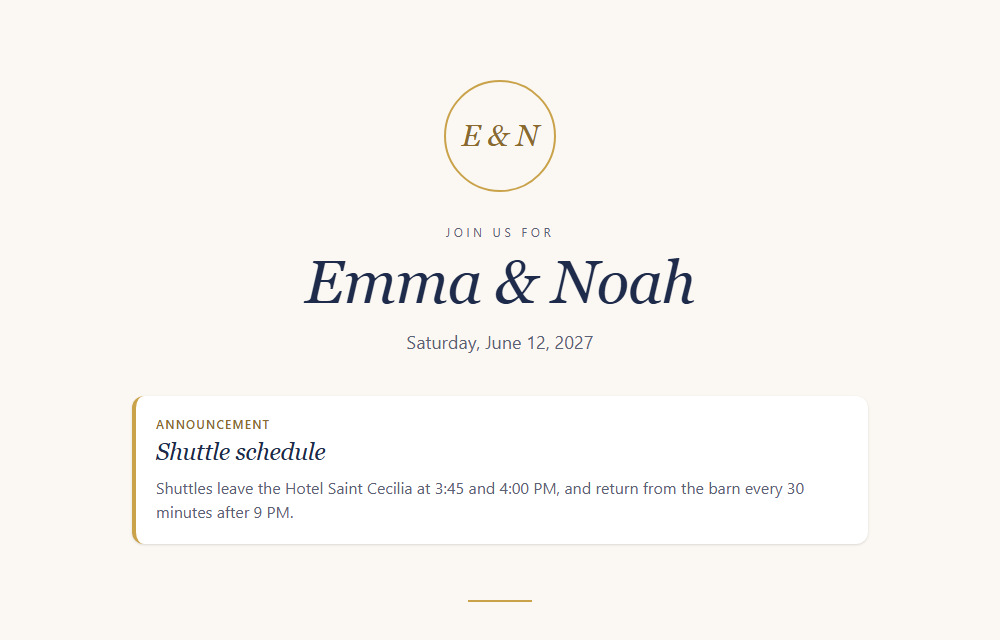
- Classic: cream paper, navy ink, and gold details. Free.
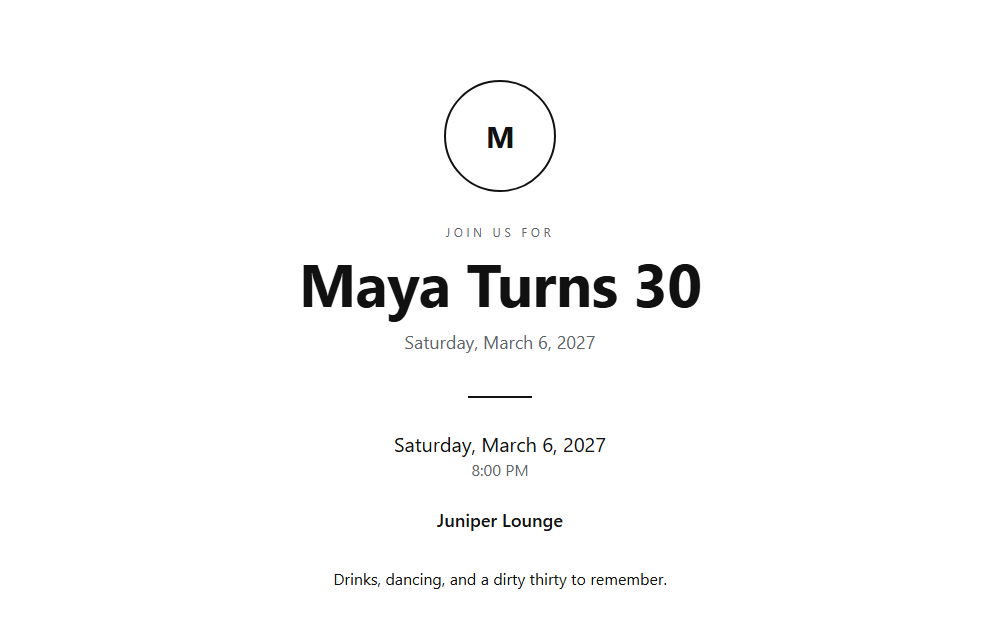
- Modern: crisp white, bold sans-serif, clean lines. Free.
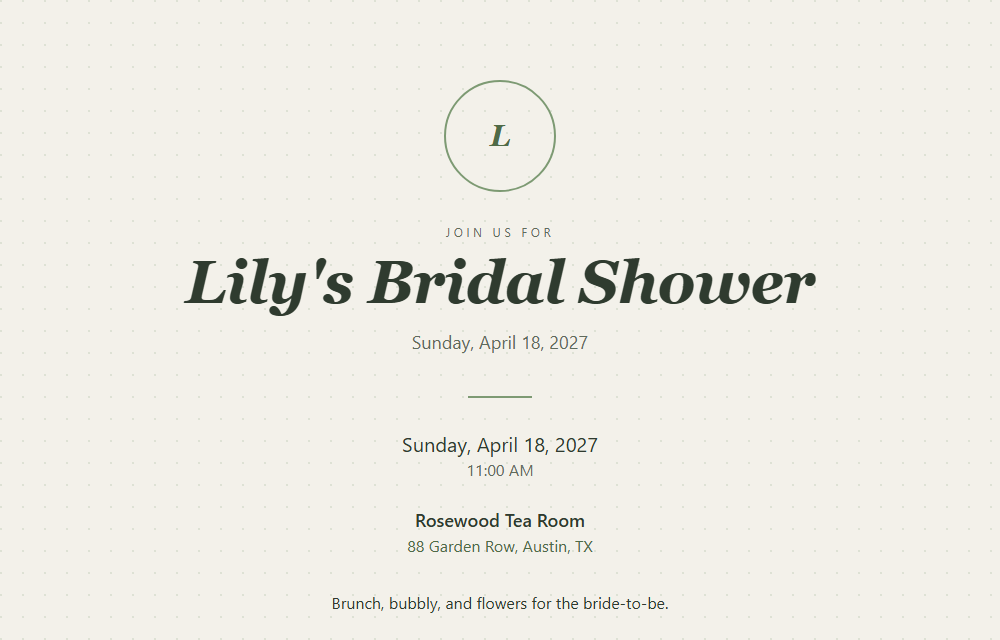
- Garden: soft sage, linen, and romantic serif headings. Plus.
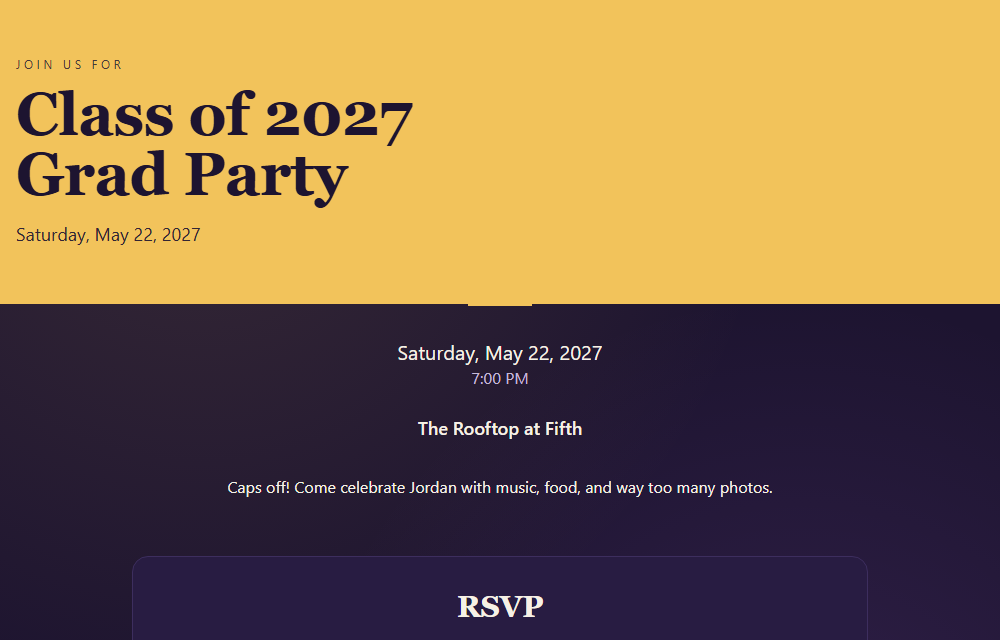
- Celebration: deep plum with champagne gold, made for parties. Plus.
Accent color
Keep the theme's color, or pick your own to match your invitations. Buttons and highlights use it, and text on buttons automatically switches to light or dark so it stays readable.
Header
- Monogram: your initials in a circle above the event name (e.g. "S & J").
- Full photo: your photo fills the top of the page with the name over it.
- Banner: a colored band with your name, and your photo beside it.
Upload a header photo up to 8 MB (JPG, PNG, or WebP). Landscape photos work best for the full-photo header.
Want something completely custom? Request the custom theme add-on when upgrading.
Password protection Plus
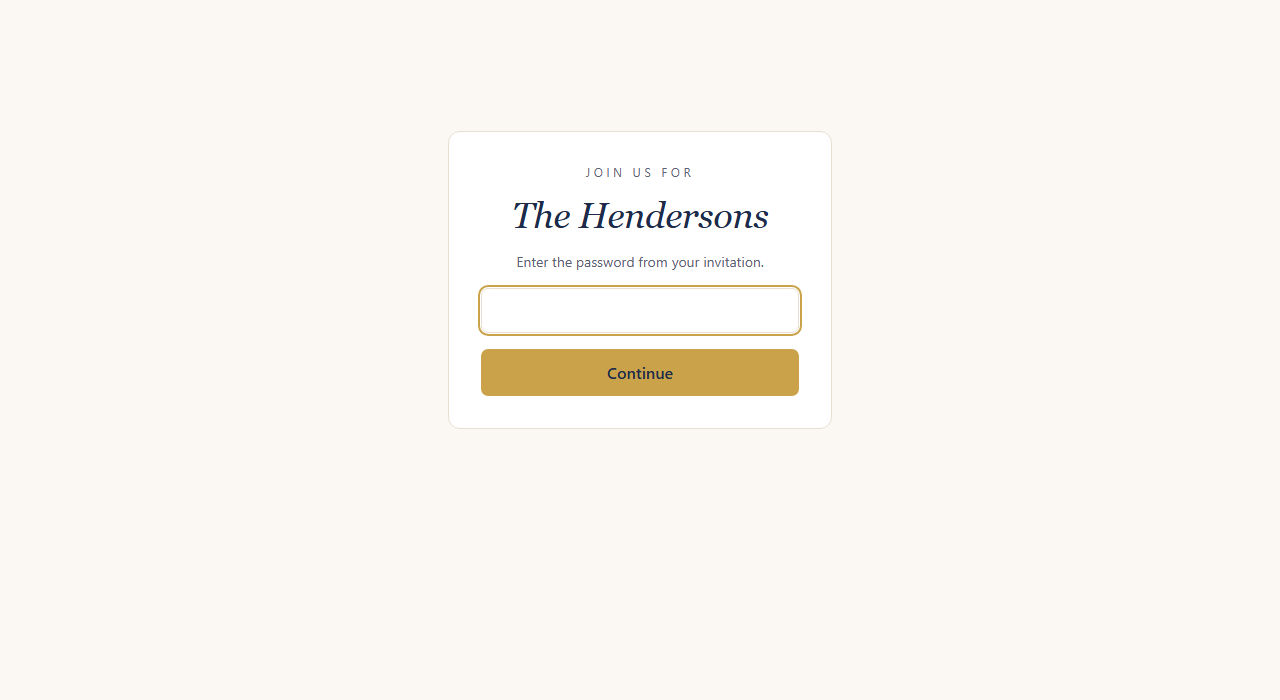
In Settings, set a password and guests will need to enter it before they can see your page or RSVP. Print it on your invitations. Guests only need to enter it once per visit. To remove it, tick "Remove password" and save.
Schedule (multi-part events) Premium
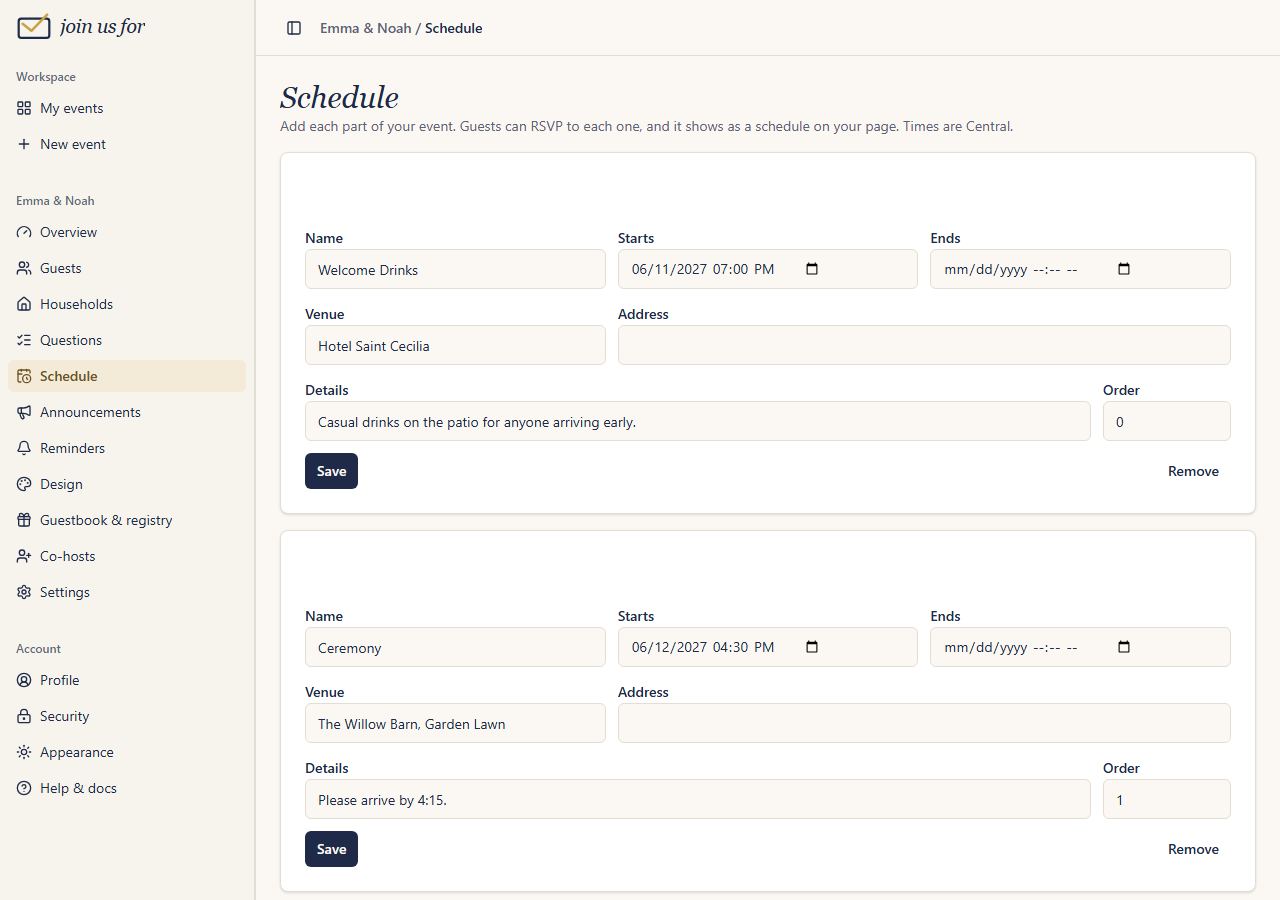
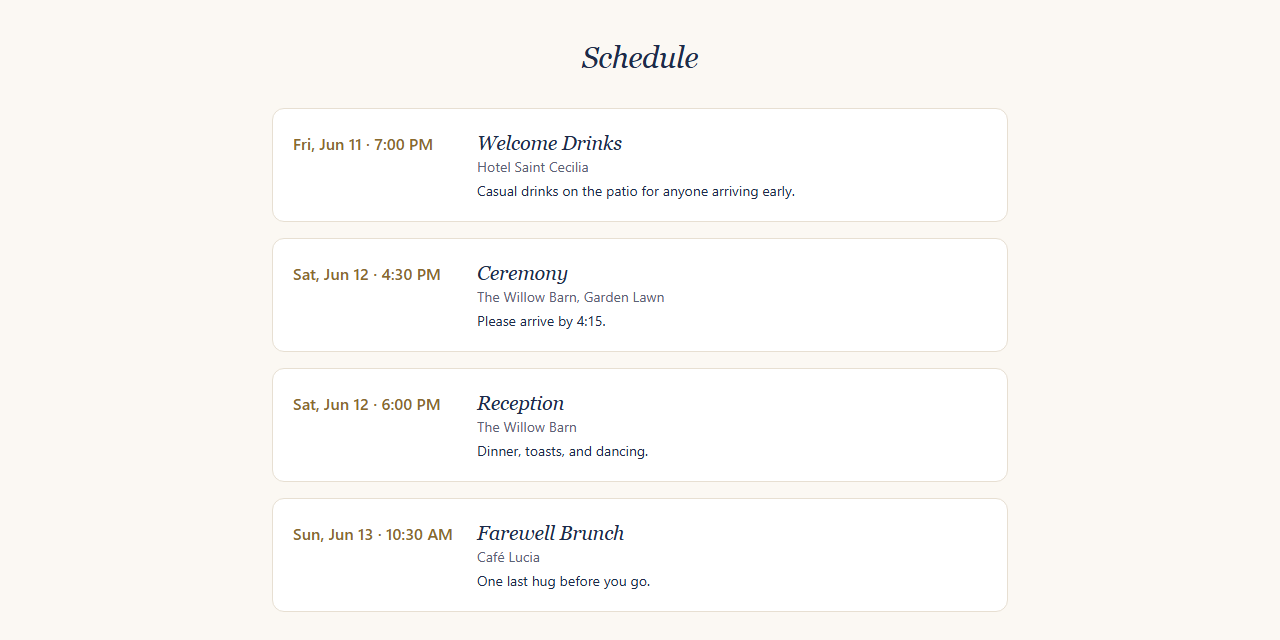
Under Schedule, add each part of your event, such as the rehearsal dinner, ceremony, reception, or farewell brunch, with its own time and venue.
- Your page shows them as a timeline.
- Guests who accept can choose which parts they'll attend.
- The Overview shows a headcount for each part, and the CSV export has a column for each.
Your event is considered over the day after its last scheduled part.
Guestbook, photos & registry Premium
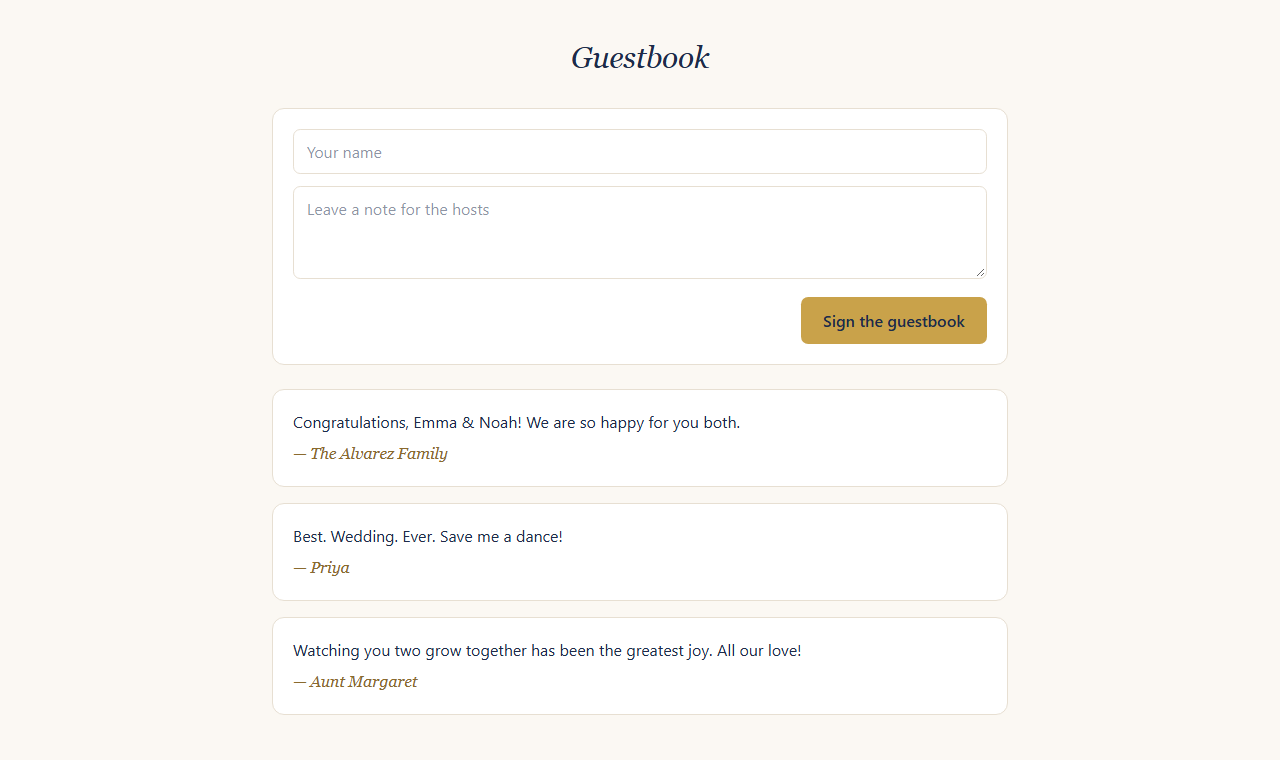
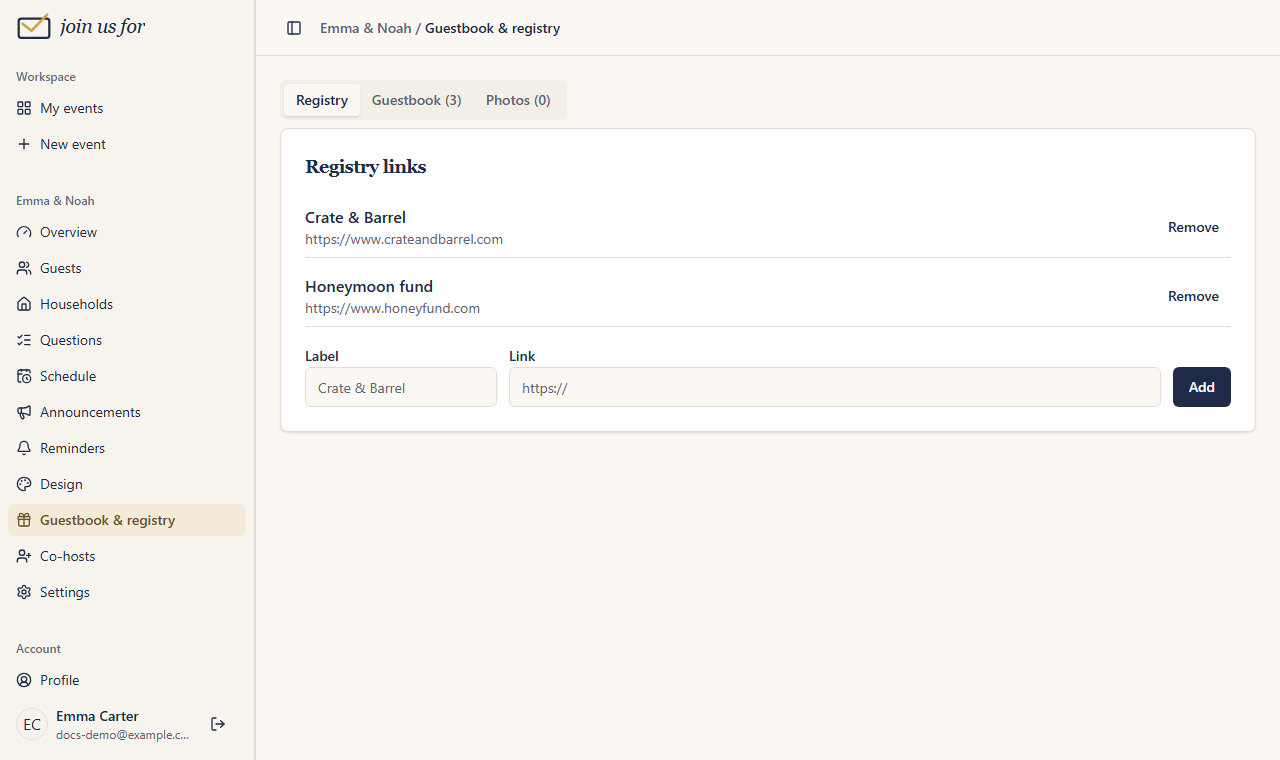
- Registry: add links to your registries and they appear as buttons on your page.
- Guestbook: guests can leave a note on your page. You can hide or delete any entry.
- Photos: guests can upload photos (up to 10 MB each) to a shared gallery on your page, before and after the event. You can hide or delete any photo.
Manage all three under Guestbook & registry in the sidebar.

Co-hosts Premium
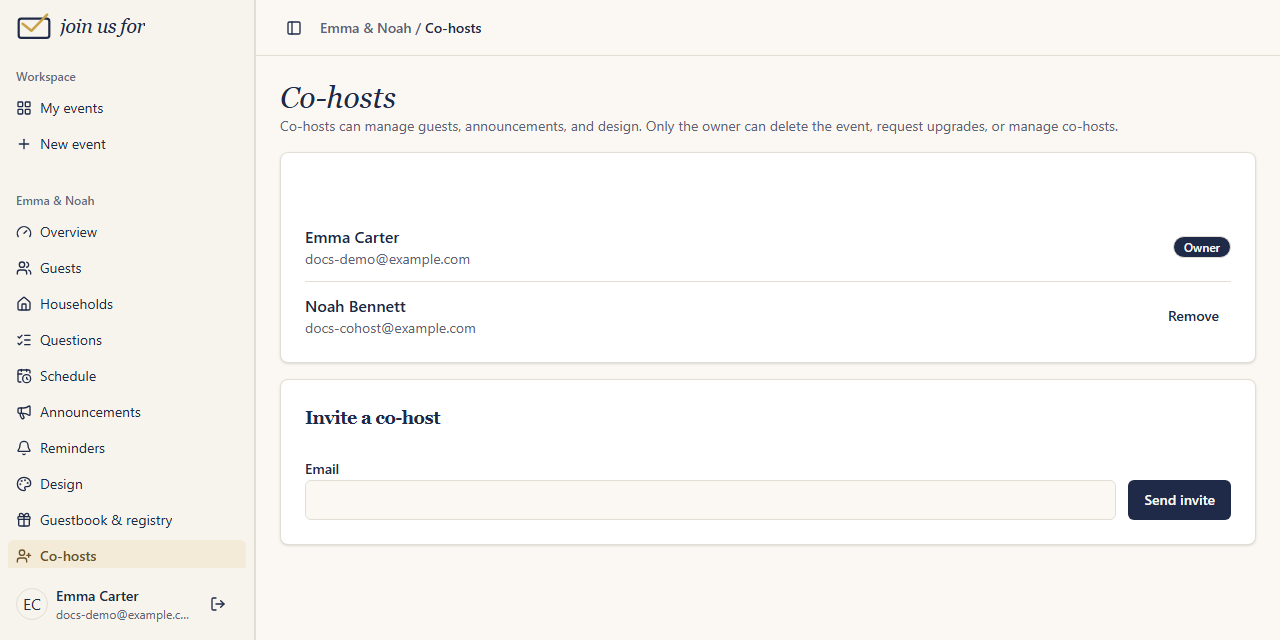
Under Co-hosts, invite a partner, parent, or planner by email.
- If they already have a Join Us For account, they're added right away.
- If not, they'll get an email inviting them to sign up. The event appears on their dashboard once they create an account with that email and verify it.
Co-hosts can do almost everything: manage guests, post announcements, schedule reminders, change the design, and export. Only the owner can delete the event, request upgrades, or add and remove co-hosts.
Upgrading
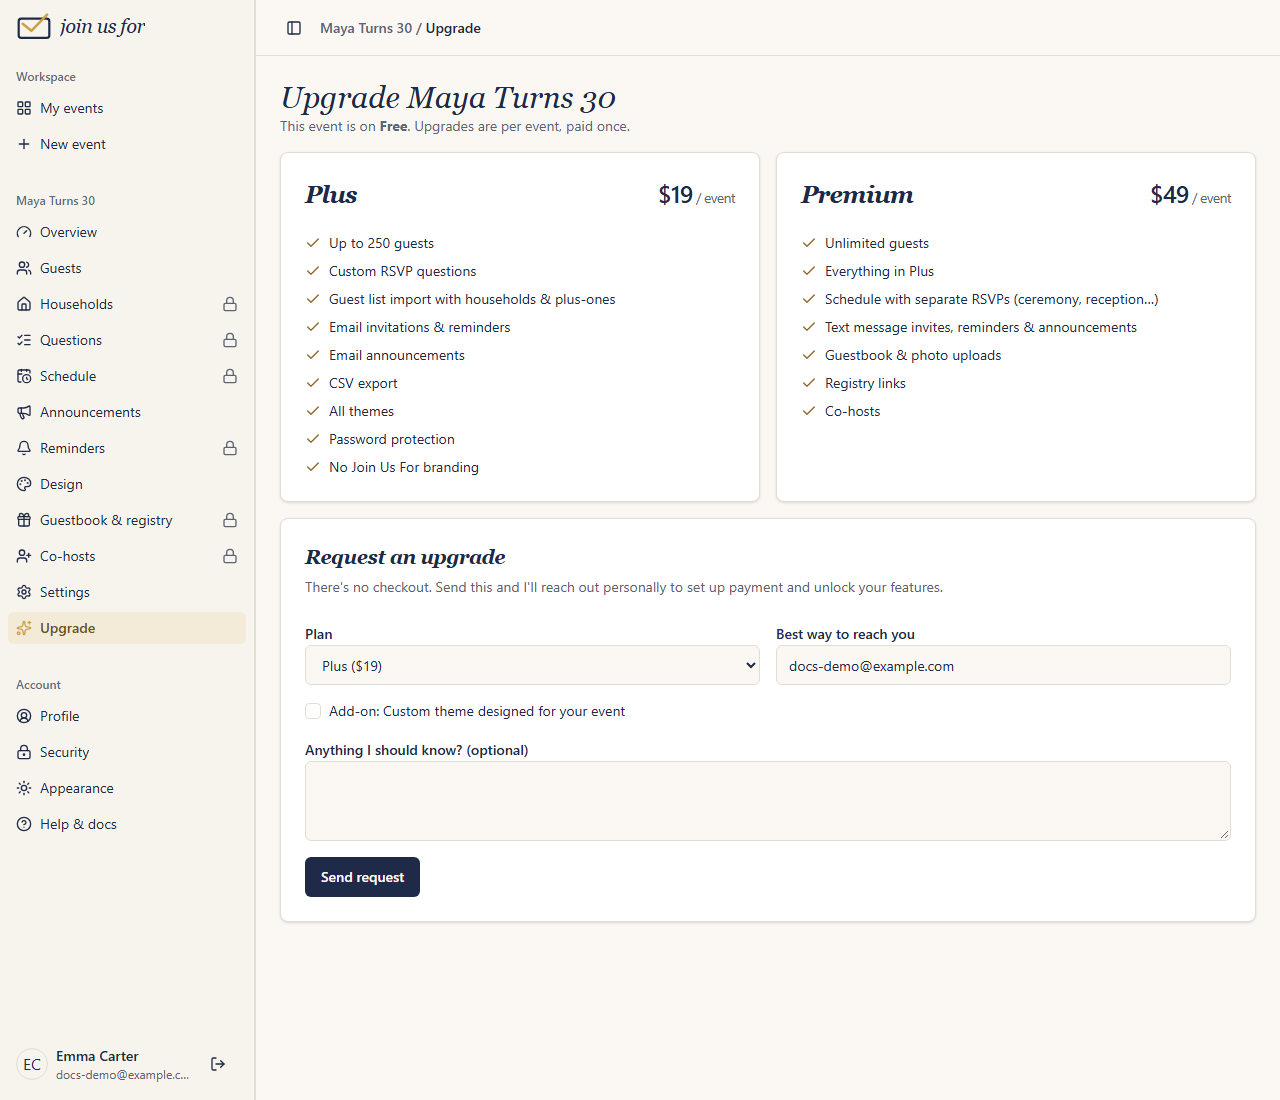
There's no checkout. Upgrades are handled personally:
- Open Upgrade in your event's sidebar.
- Choose Plus or Premium, add any extras (like a custom theme), tell us the best way to reach you, and send the request.
- We'll reach out personally to arrange payment and switch your event over. You'll get an email the moment your new features are unlocked.
Each event can have one open request at a time. Upgrading a free event also frees up your free slot for another event.
After the event
- Ended: the day after your event (or its last scheduled part), it's marked ended automatically. RSVPs close, but your page stays up so guests can still find details, photos, and the guestbook.
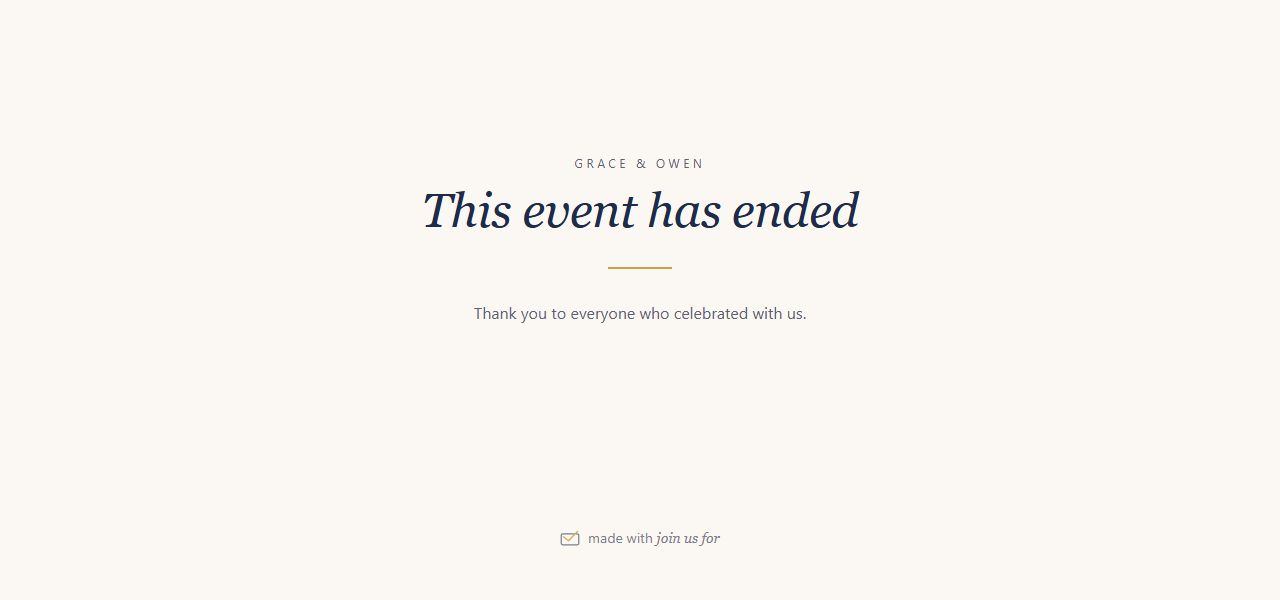
- Archived: 14 days after the event, it's archived automatically. Your page shows a simple "This event has ended" message. You can still see your guest list and export everything. You can also archive early from Settings.
An ended or archived free event no longer uses your free slot, so you're free to start your next one.
Deleting & restoring
- Only the owner can delete an event (at the bottom of Settings). The page goes offline immediately and any scheduled reminders are cancelled.
- For 30 days, you can restore it from the "Recently deleted" list on your dashboard, with nothing lost.
- After that, the guest list, responses, photos, and other uploads are permanently erased. The web address stays retired so it's never given to anyone else.
Deleting your account deletes the events you own in the same way.
FAQ
Do my guests need an account or an app?
No. They just open your link.
A guest needs to change their RSVP.
They can use the link in their confirmation email. If they've lost it, have them RSVP again with the same email and the link will be re-sent. You can also change their response yourself on the Guests page.
Someone replied by phone. How do I add them?
Use Add guest on the Guests page, then edit them to record their response and party size.
Why can't I publish?
Either your email isn't verified yet (check your inbox, or resend the link from your dashboard), or your free slot is already used by another live free event. Upgrade this event or wait until the other one ends.
Can I change my web address?
No, addresses are permanent so links on printed invitations never break. If you need a different one, create a new event.
What time zone are dates in?
Central time, for everything: event dates, RSVP deadlines, reminders, and when events end.
Still stuck? Reply to any email from us and we'll help personally.